The best and easiest way to label your home brew beer
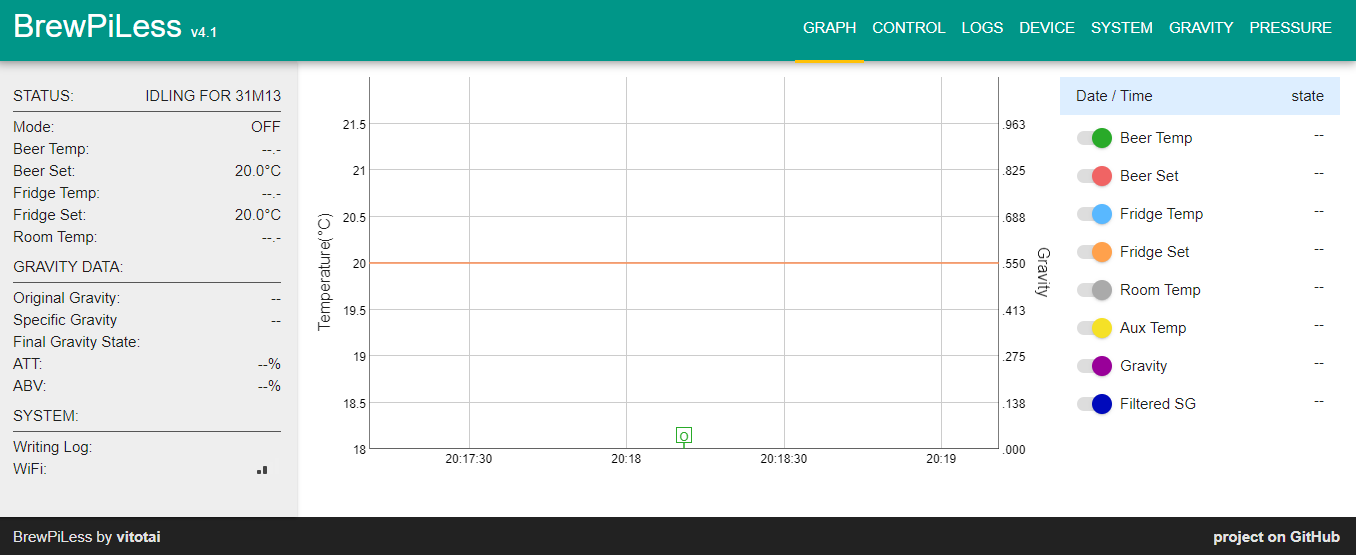
If you've been checking out my blog, you might notice I like to make things a bit more complicated than they might have traditionally needed to be. I'm a fan of automation and technology and I see no reason why that can't be true in beer brewing! However, my labels were sorely lacking on all accounts. In fact, up until last week, I just used a chalk marker to write uninspired things like 'Dubbel' or 'Saison' and a date. Then I read something that inspired me to act.
I should start off with, this is hardly a techy solution to labelling beer bottles, in fact it's pretty basic. So basic, that if you're messing about with printer labels, and templates etc, I'd say just give this a go, it's simple as hell.
I had a couple of requirements that had kept me from doing more than just writing on the bottles:
- Look professional
- Be easily removable
- Not require buying anything new
I came across a thread around what others were using to adhere their labels to their beer bottles and as I read through the conversation I saw a reference to 'Wheat Paste'. This has been around for a long time, and has been used in book-binding because it's pretty robust, doesn't have anything in it that would degrade the paper, and it's reversible with moisture. So in a test, I simply wet the label under running water for 20 or 30 seconds and the label peeled right off. A bit of tearing but easy to rub away any residue afterwards.
To create your own wheat paste combine 1 part flour with 4 parts flour in a saucepan. Heat on the stove until just before the boil while whisking continuously. You want it to become a bit thicker with the heat, but not so much that it couldn't be painted on. Think of the consistency of wall paint. If you find that you're getting a bit too thick, just add a bit more water. Whisk it continuously while applying heat, and once you're happy with the consistency, simply take it off the burner. This is now ready to go.
Making it is incredibly simple, but here's a more detailed post on how to do it.
One of the recommendations I found was to use relatively thin paper with wheat paste, to let it absorb some of the moisture, strengthening the bond with the paper. They suggest standard 20 pound bond office paper. This is great because it's what's loaded into my printer at home.
After going through several sites looking for a label generator, I ended up simply going to google slides and making a slide that is 4in x 4in square and simply made something that looks good enough. If you want things to look really pro, here's a tip. Make the print go to the edge of the page. Simply trim into the image a bit and it'll look really good. Here's what I came up with (I know, I still need to get more creative with my naming!).
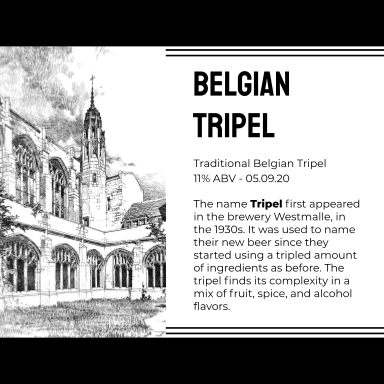
I don't have a colour printer, or more accurately, I'm too cheap to load my printer with colour ink, so I just made something black and white.
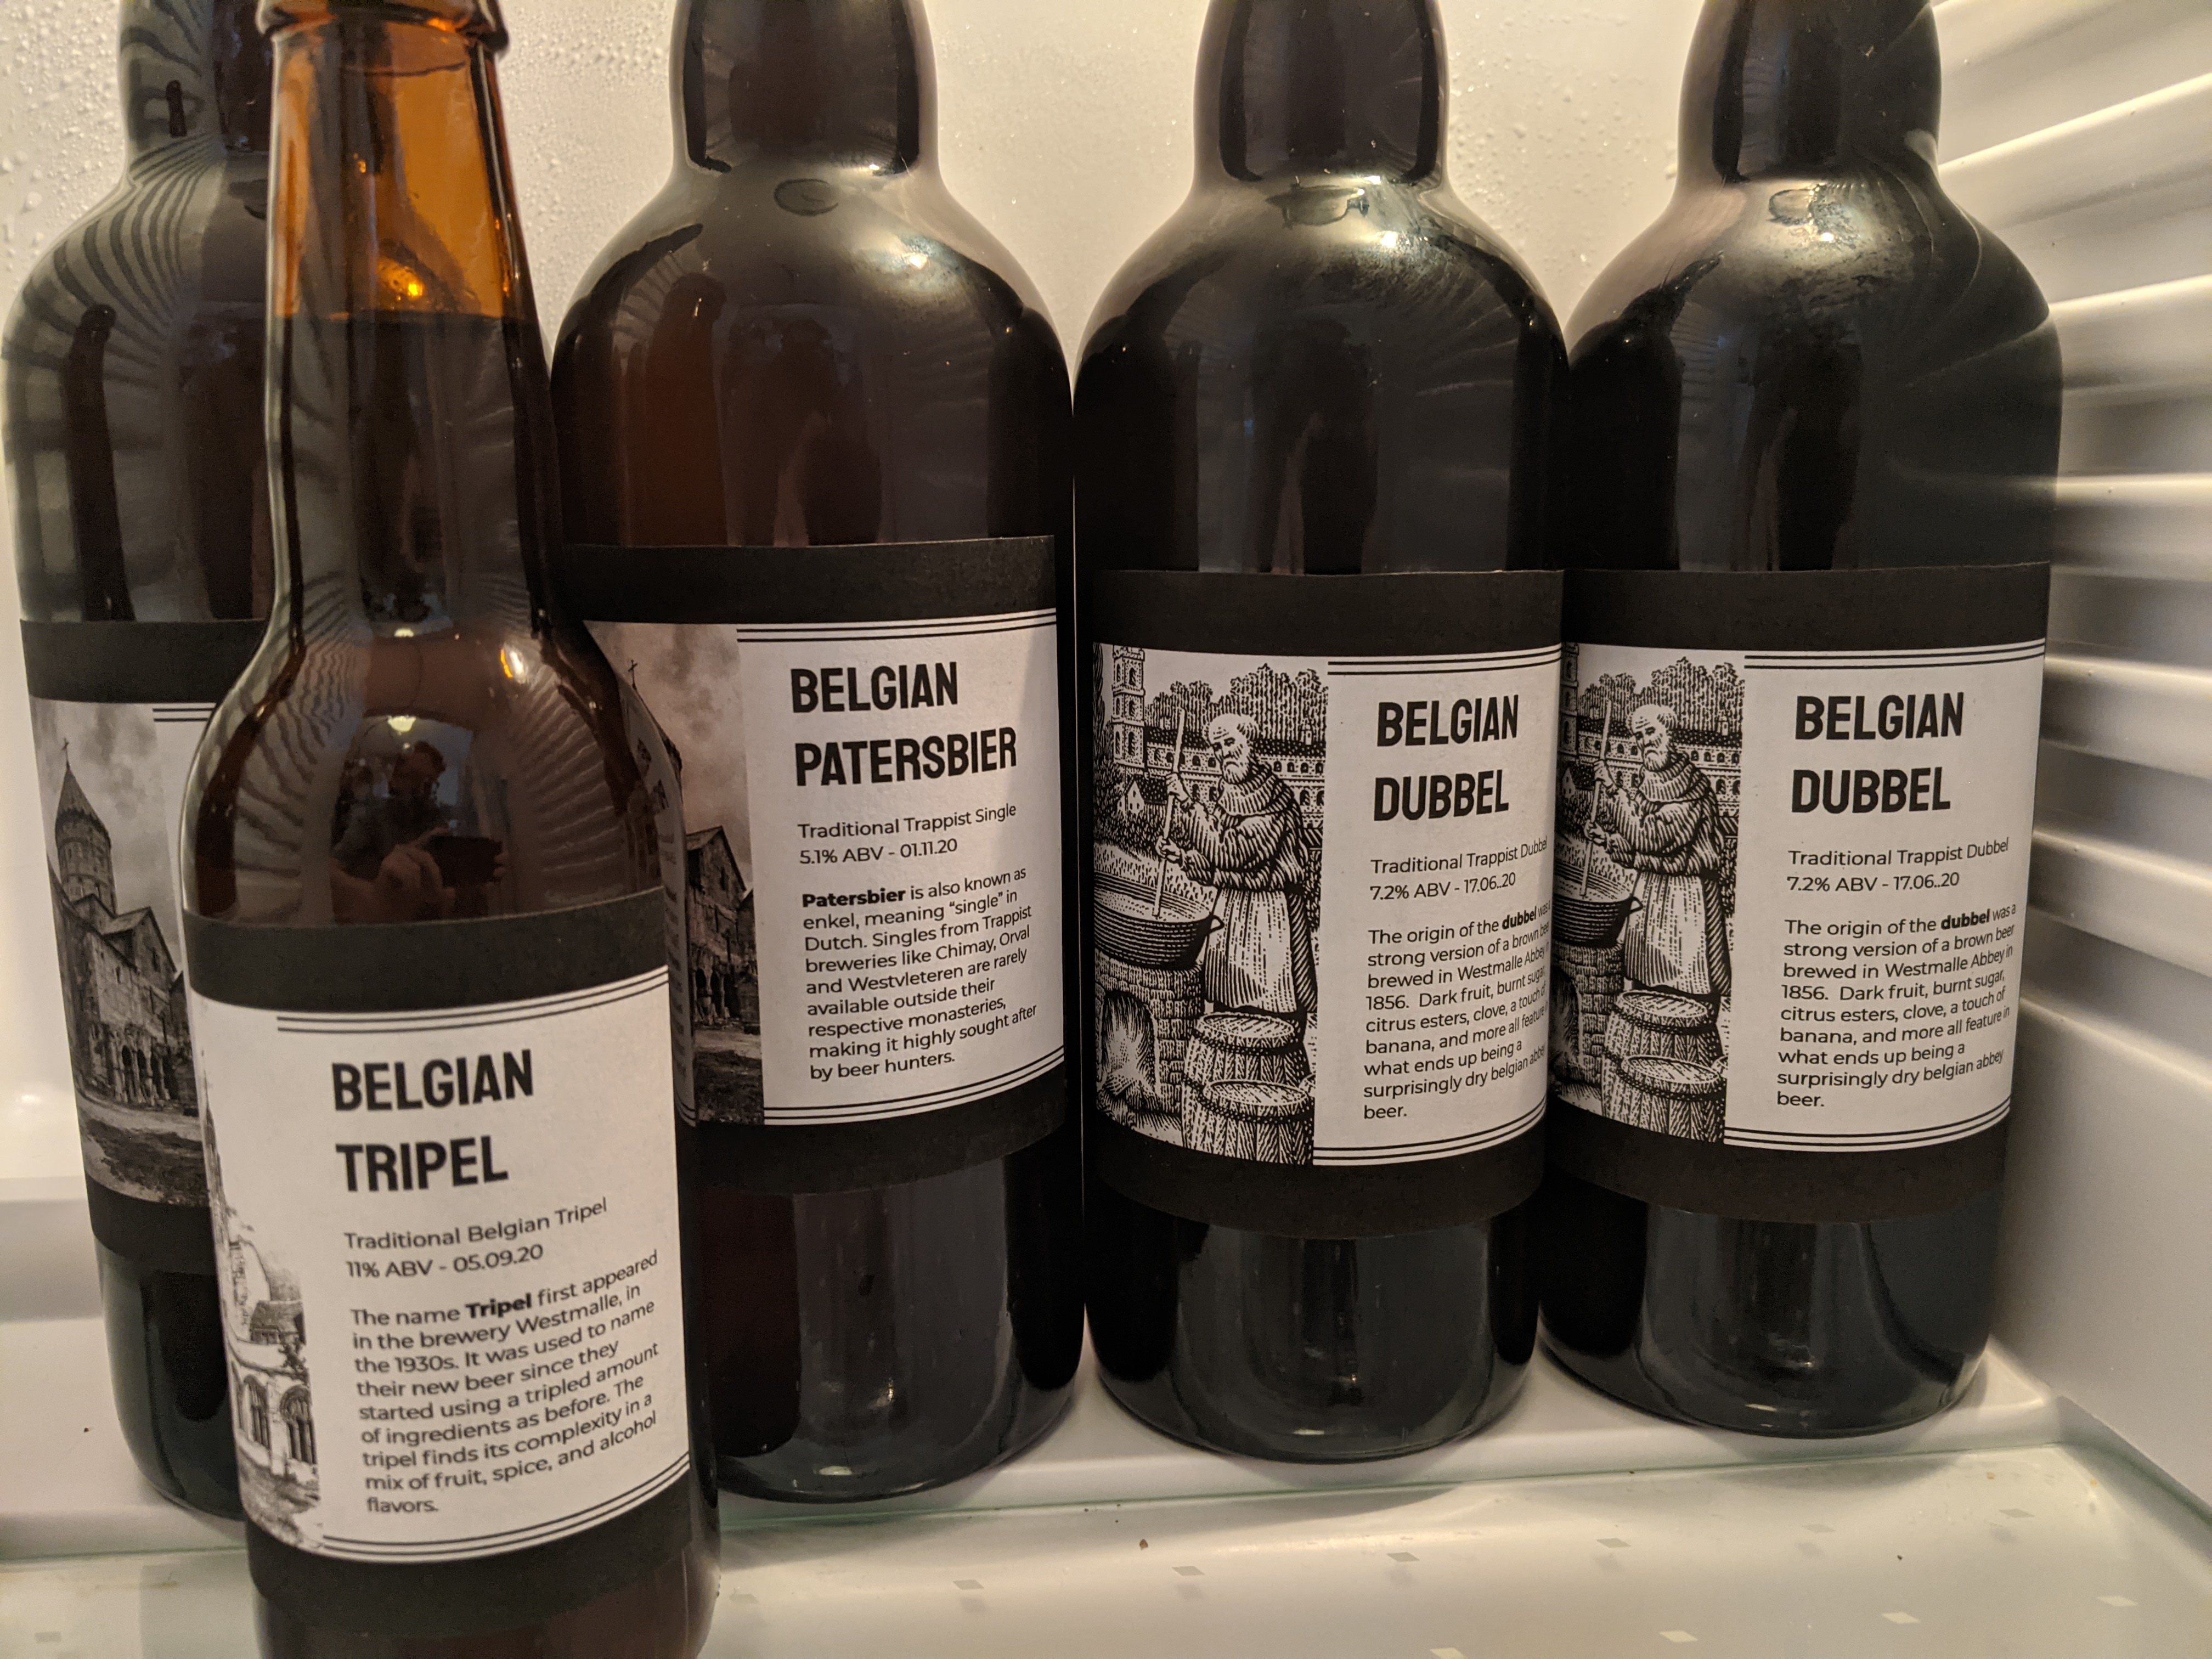
After sticking the paper to the bottle with the wheat paste, following instructions to get the paper quite most, but not sopping wet, I was stunned with how professional the look and feel was after it dried. Don't forget to paint on your paste right to the edges. It looked just like a wine bottle with a label that has a matte finish. Truly amazing looking for what was literally the simplest thing I could do with things in my house already.
I strongly recommend giving this a try, it's gives a really professional result, and you can do it so easily! Check out how the above label came out:

Happy brewing everyone!